Standalone Mode
This section provides a detailed configuration guide for the MobileConnect and CinemaConnect system in Standalone Mode.
Setup
To configure the system in Standalone Mode:
► 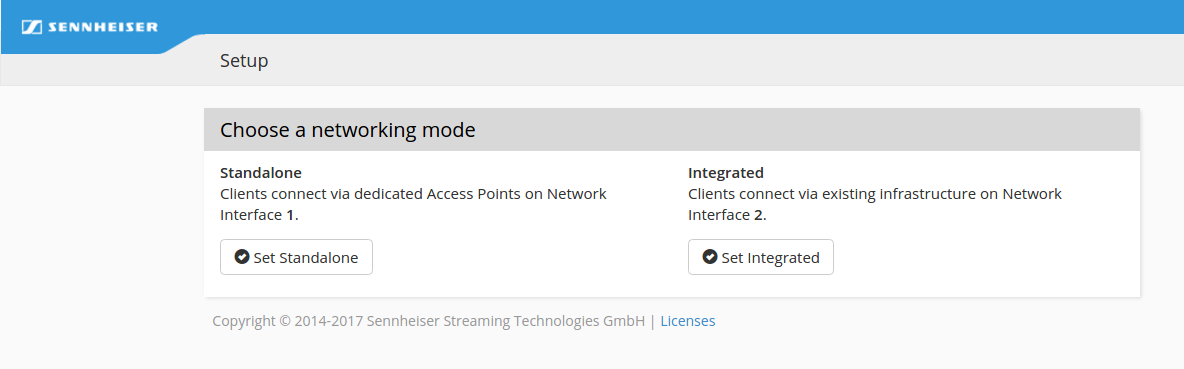

Select
Set Standalone and proceed with the initial system setup.
First, change the password:
► 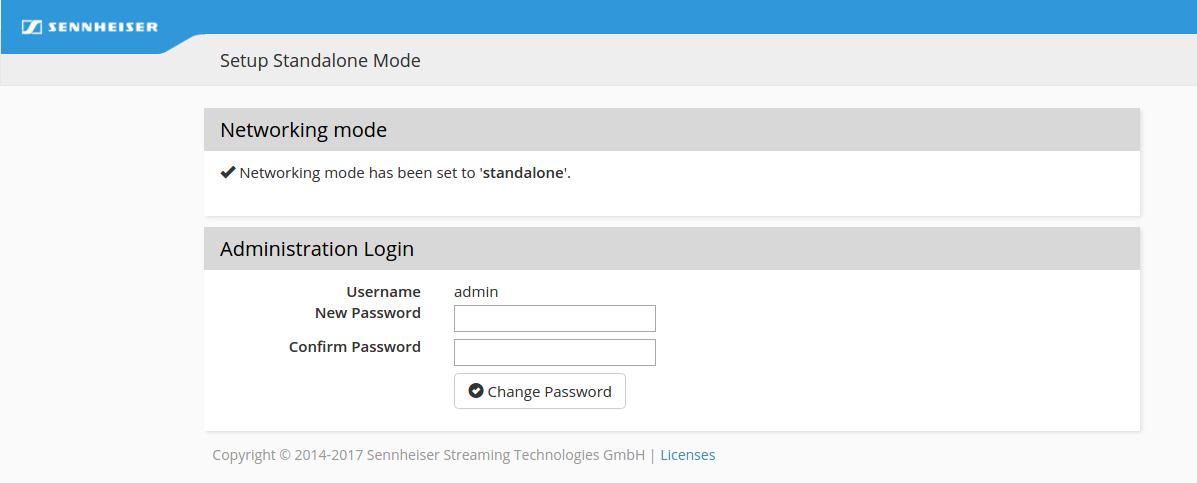

This setting can be modified later or recovered with a factory reset (see
"Factory reset").
Select your country from the dropdown menu and click
Set country (this will affect the Access Point configuration).
► 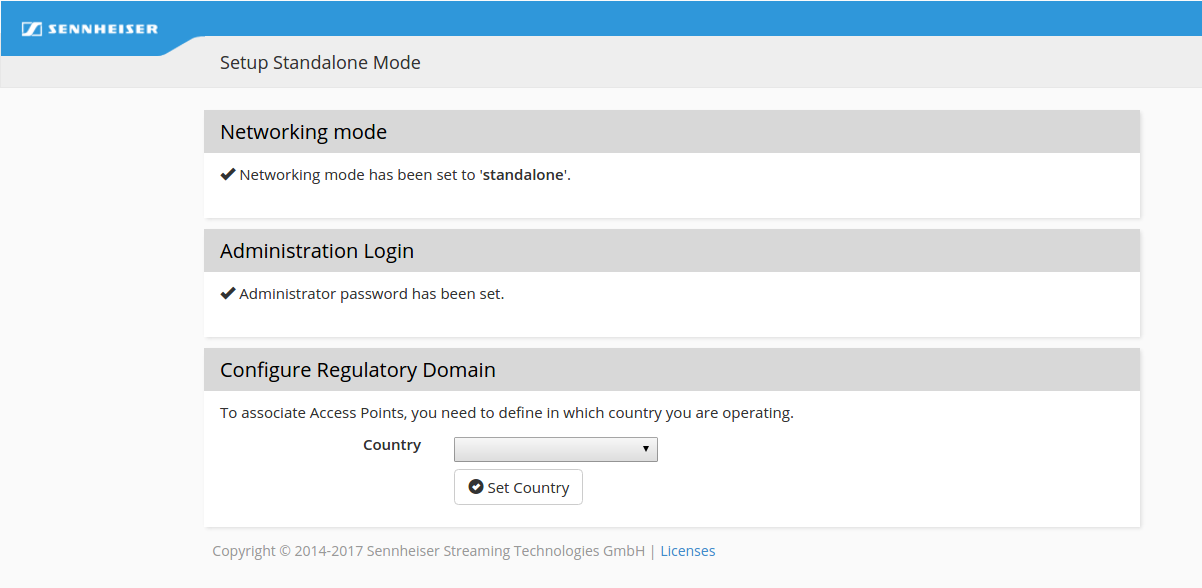

This setting can be modified only with a factory reset (see
"Factory reset").
You can scan for an Access Point connected to the ConnectStation (see
"Standalone Mode" in section
"Network integration"), add a known Access Point manually, or finish the configuration and add an Access Point later on.
► 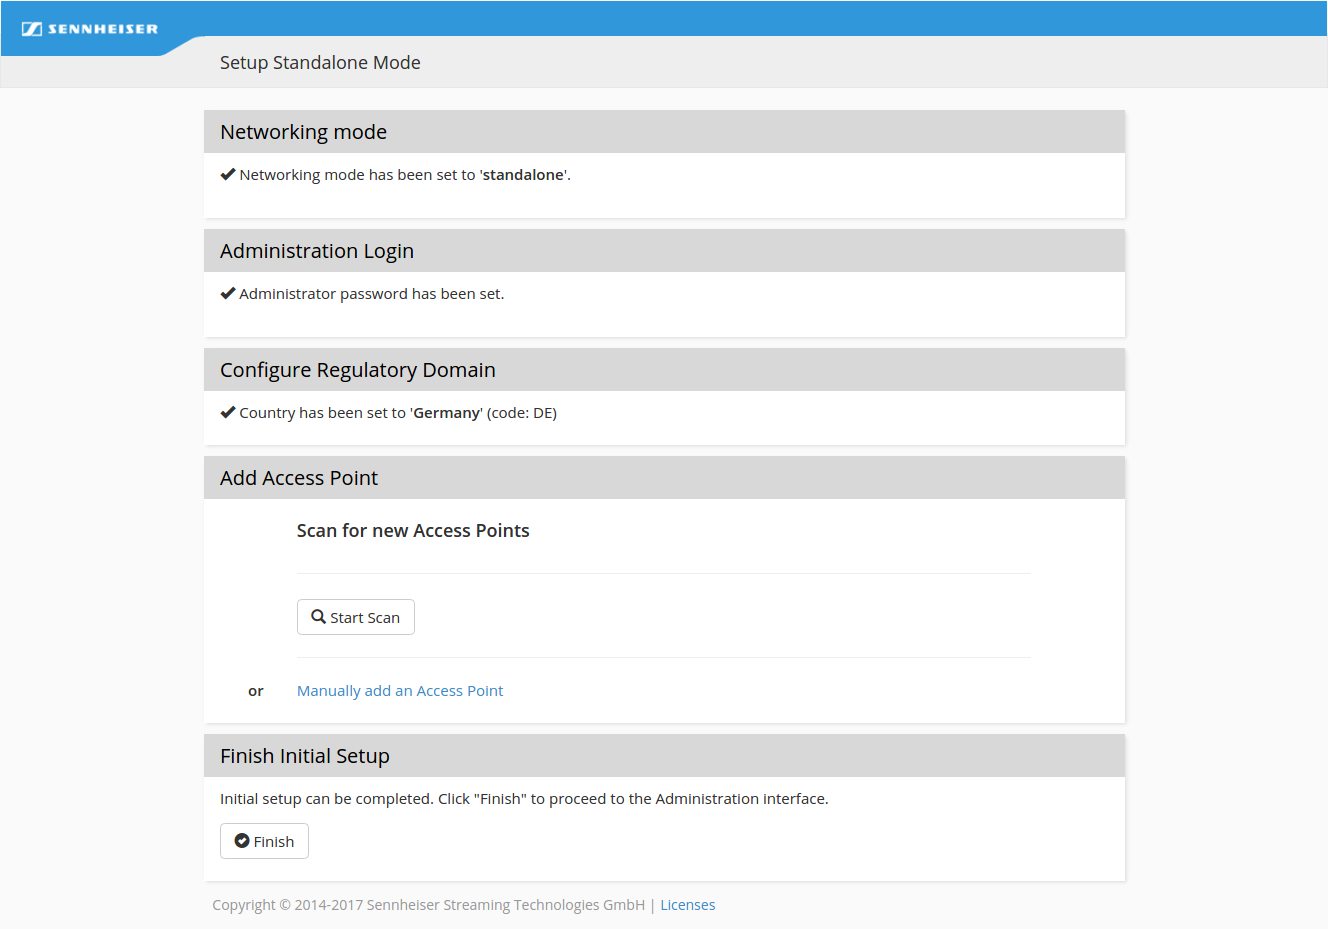
Click
Start Scan, wait until an Access Point is found and select
Add.
► 
Once the Access Point is added successfully it is shown as
Associated:
► 
To manually add a known Access Point please provide the IP address of the Access Point:
► 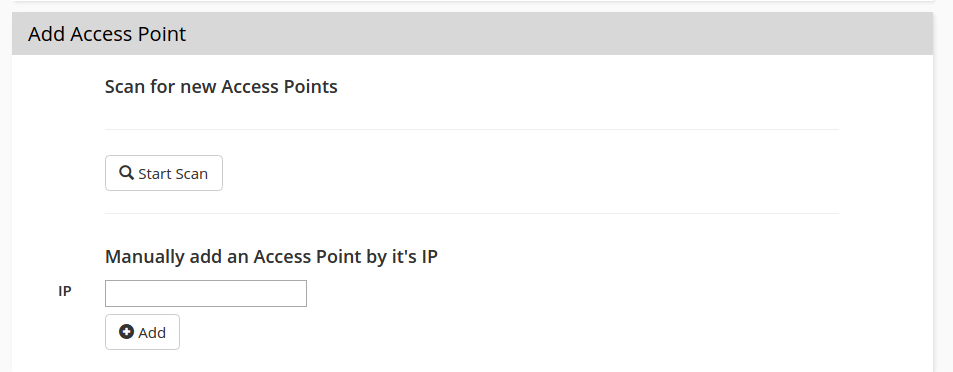
Click
Finish to finalize the Standalone Mode setup.
► 

In order to change the network mode a factory reset is required (see
"Factory reset").
System Overview
The System Overview page gives the user basic information about the system such as the following.
Resetting the password.
► 
Finding the model, serial number, software system release and current status of the system.
Checking the self-status notification to find errors in the system configuration.
Time Set-Up: Here you can change the time and timezone for your Connect Station which is necessary to generate the client statistics (see
"Client Monitoring").
Note: A change will delete the existing monitoring/client statistics data.
► 
Changing the name of the ConnectStation.
• The default name is the serial number of the ConnectStation. To change it enter a new name and click Apply.
► 
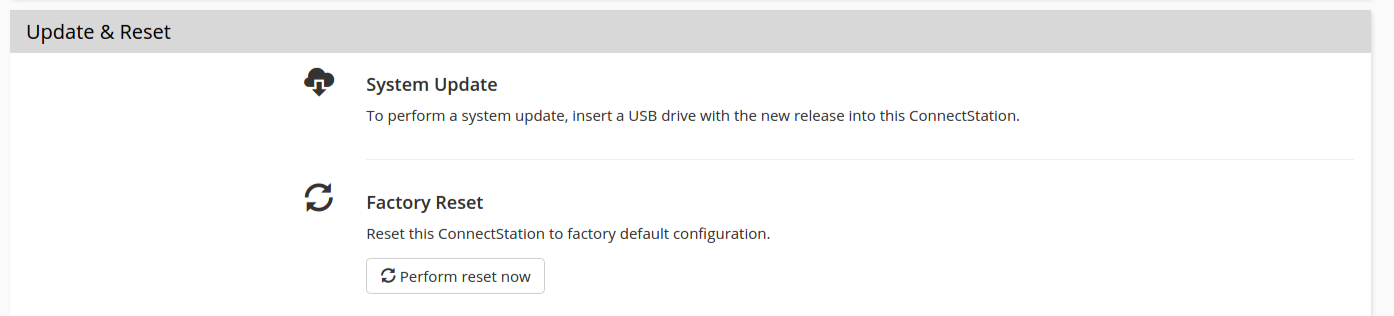
Updating the firmware using a USB drive.
• For the latest firmware see here:
Performing a factory reset.
• This will reset the system to factory defaults. Your configuration will be lost.
► 
Increasing the number of clients.
• The default number of clients per ConnectStation is 50, while a maximum of 100 is supported. A minimum of two Access Points is required to support 100 clients.
► 
► 
When the number of clients per ConnectStation is increased to 100, a client limit is set on the Access Point:
► 
Network
The Network page allows the user to modify the network configuration.
► 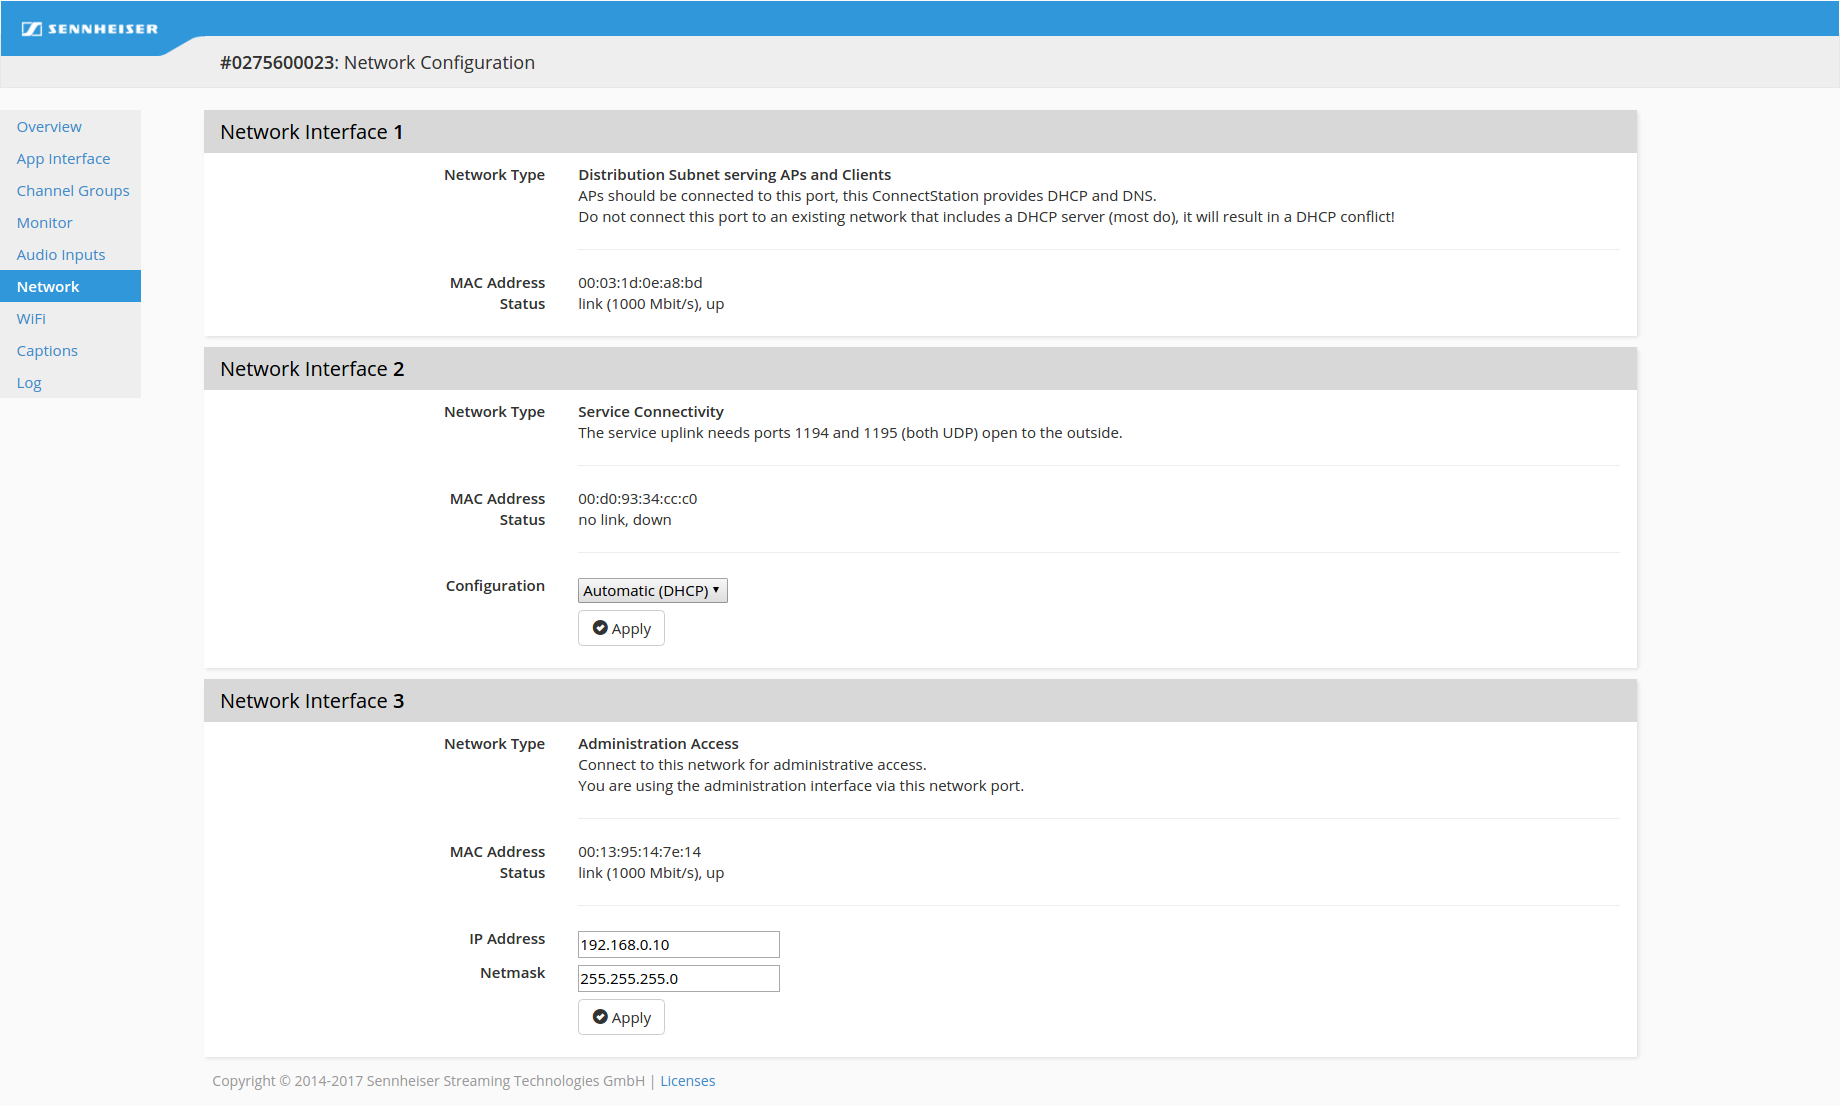
In Standalone Mode the
Network Interface 1 (
LAN1 socket of the ConnectStation) cannot be modified.
Connect your Ruckus Access Point to this socket.
In Standalone Mode the
Network Interface 2 (
LAN2 socket of the ConnectStation) is not used except for service and support are required.
You can also use this interface for administration access if you connect it to a network with a DHCP server.
You can change the static
Network Interface 3 (
LAN3 socket of the ConnectStation) for administration access.
WiFi
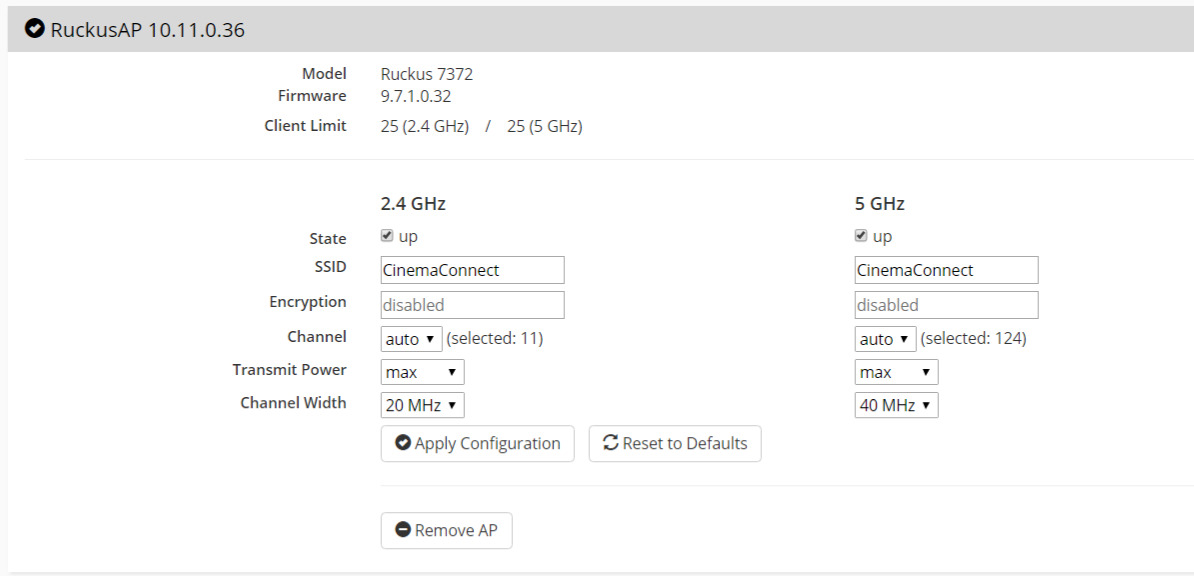
In the
WiFi page of the Admin Interface you can add, remove or configure your Ruckus Access Points. Up to 8 Access Points can be added for a single ConnectStation (see
"Standalone Mode" in section
"Network integration").
► 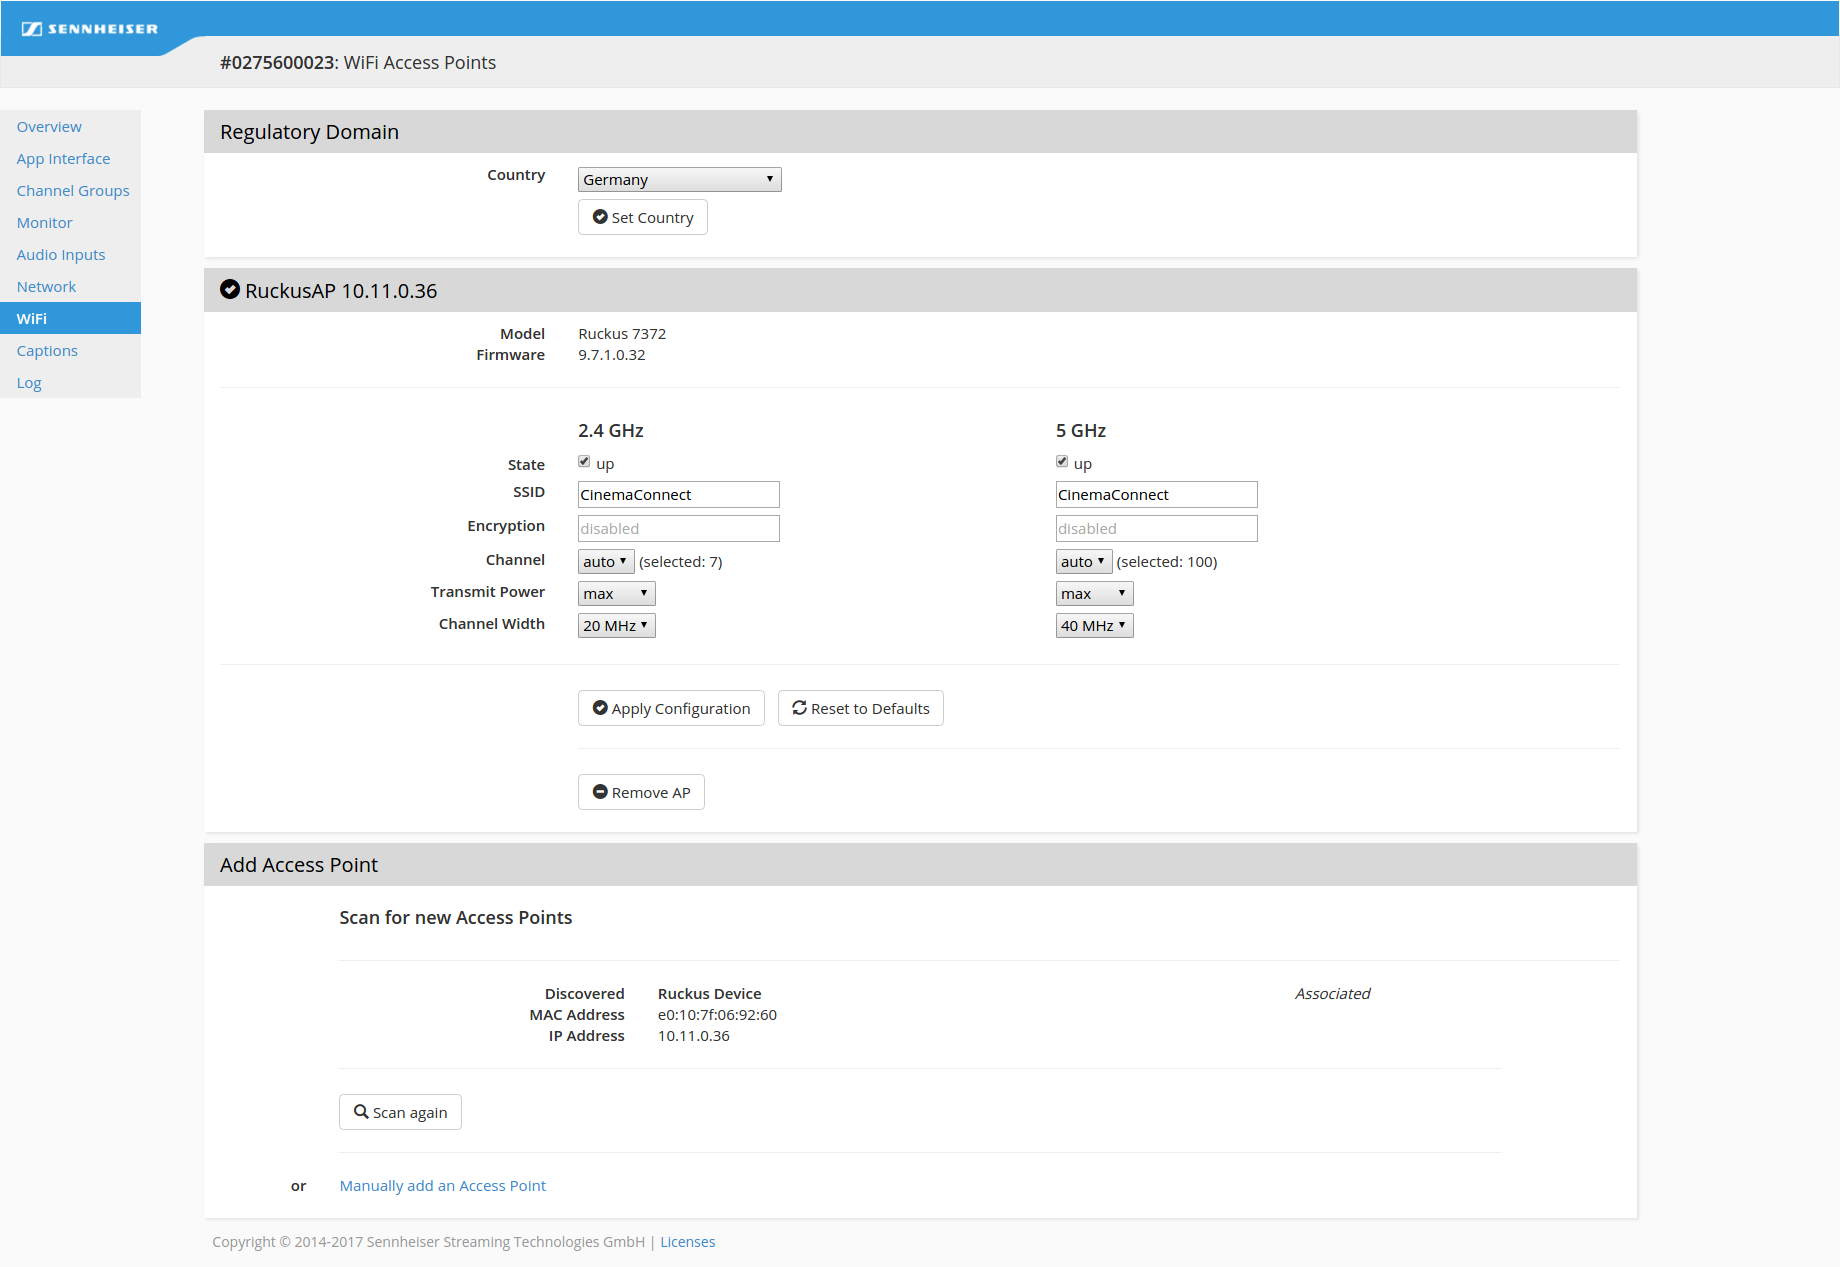
The Access Point is pre-configured to the SSID MobileConnect or CinemaConnect, depending on your hardware variant. You can modify these settings here.
WiFi recommendations:
If more than one Access Point is used, make sure that they use channels which do not overlap.
At 2.4 GHz, you can use channels 1, 5, 9, and 13 with a bandwidth of 20 MHz (13 is not available in some countries).
If you use more than 4 Access Points in that band, try applying the same frequencies for Access Points which are further apart.
If all Access Points are in close proximity, it might be better to turn off the 2.4 GHz band in some Access Points in order to avoid overlapping.
You can check if your Access Points use overlapping frequencies by means of a WiFi analyzer app in an Android phone. At 5 GHz, also avoid using channels that overlap, and prefer channels with indexes lower than 50, which do not have to do DFS.
If you use the default setting for channel selection, set to “auto”, make sure you give enough time for the Access Point to find the optimal channel.
The Ruckus Access Point may switch frequently for 1 to 2 hours after booting up, until the optimal channel is found. If the Access Point is in use during that time, the clients may experience the connection breaking up from time to time.
 Make sure the Access Point is connected to the LAN1 socket of the ConnectStation (see "Standalone Mode" in section "Network integration").